
Or – “Your guide to smoother moves.”
Consider this a follow-up to yesterday’s post on the Wario game for Wii. Today, I’ll be going into detail on the various control schemes the game uses for the microgames. Not much more explanation about this post is needed, so…
Let’s begin!
1 – Shomen
Point and Click. Aim with the wiimote and perform actions (as needed – some Shomen microgames only use pointing) by pressing the A button.
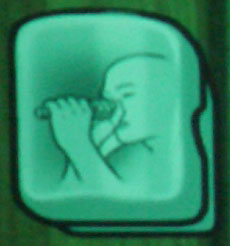
2 – Takinobori
Wiimote held pointing upwards. Shake, swat, tilt or twist as needed.
3 – Ryonigiri
Wiimote held horizontally (sensor pointing left, buttons pointing upwards) with both hands. Push down, pull towards you or tilt side to side.
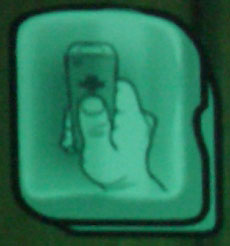
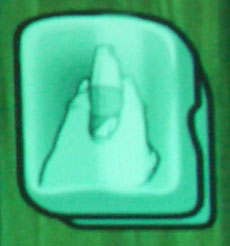
4 – Tappitsu
Wiimote held like a dart. For microgames requiring precise aiming.
5 – Mawaryanse
Wiimote held horizontally (sensor pointing left, buttons pointing towards you) with both hands. Tilt, push, rotate or shake.
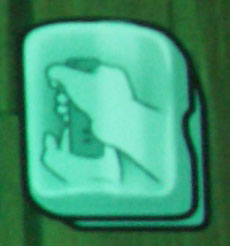
6 – Gedan-no-kamae
Wiimote held as though it’s the hilt of a sword you’re about to draw. Slashing or flicking moves needed here.
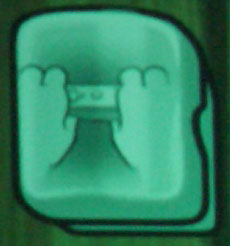
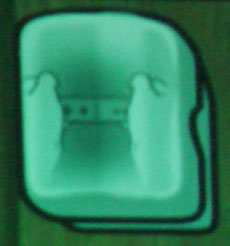
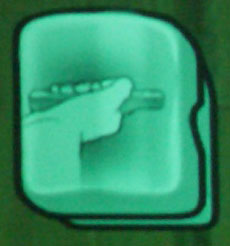
7 – Tsunahiki
Wiimote held with both hands, sensor pointed towards the screen. Thrust back and forth, jerk towards you or aim as needed.
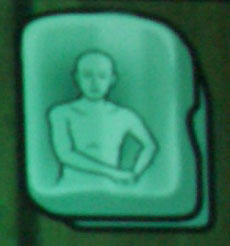
8 – Tenori
Wiimote balanced on one hand. Precise balance or tilting required. One microgame requires rapid taps on the wiimote, so I’m not sure what it’s doing in this section.
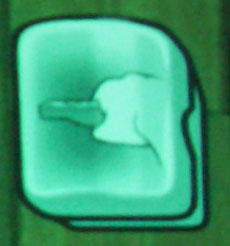
9 – Tengu
Use the Wiimote and make like you’re Pinnochio. Aim or nod as required.
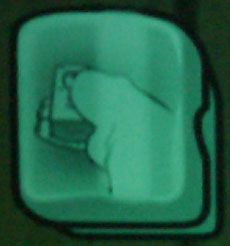
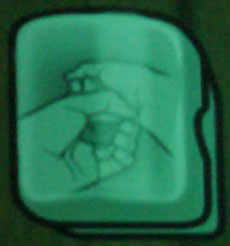
10 – Yobizumo
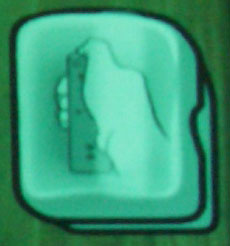
Wiimote held vertically, thumb on top. (It’s like this in the picture, but whether or not you cover the sensor has no effect on these games.) Shake, knock or pull as required.
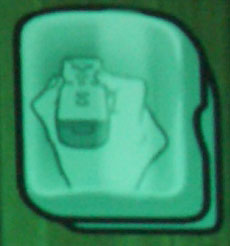
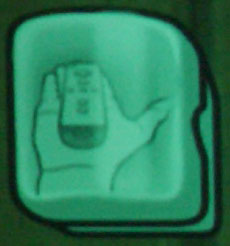
11 – Oki
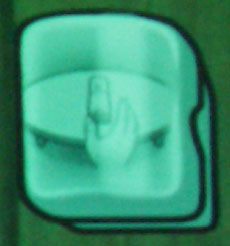
Wiimote held flat, with the buttons down. (You don’t have to actually set it down as shown in the picture.) Just pick it up, or pick it up and rotate it if required.
12 – Oibari
Wiimote held by your side. Shake your hips, jump or jerk it up as required.
13 – Shotoku-taishi

Wiimote held vertically with two hands. Tilt, swat or pull as required.
14 – Tetsu-arei
Wiimote held horizontally in one hand (sensor pointing right and buttons pointing up). Tilt, lift or thrust as required.
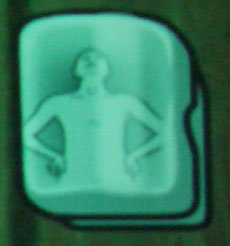
15 – Chonmage
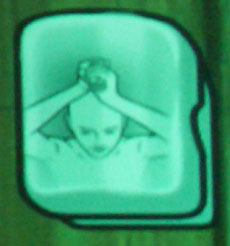
Wiimote held on your head (sensor pointing towards the screen and buttons pointing up). Squat, tilt, turn, duck or jump as required.
16 – Otsumame
Wiimote held with the sensor pointing towards the screen and buttons pointing left. Used for twisting motions or precise pointing.
17 – Okappiki
Wiimote held horizontally (sensor pointing left and buttons pointing left). Crank, punch, tilt or flick as required.
18 – Kobbozu
Wiimote held vertically (buttons towards the user). Tilt, shake or swirl as required.
19 – Nito-ryu
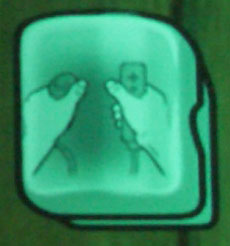
Nito-ryu is actually three different control schemes. They are the only single-player microgames that require the remote (as far as the main game in concerned).
A – Wiimote and nunchuck pointing upwards. Shake or tilt as needed.
B – Wiimote and nunchuck pointing torwards the screen. Possible actions include shaking them from side to side or up and down. Some Nito-ryu B microgames also involve twisting both controls.
C – Wiimote and nunchuck held horizontally, pointing towards each other.
That should be more than enough information for one post.
I’ll go into the multiplayer modes tomorrow.
Comments are closed.